Manage Your Profile | Top
There are two ways to access your profile, the first is under the
My Profile tab, the second is the profile status box in the top right hand corner of your screen.
Your profile screen will be the main stop to manage your account for ENTConnect. From here you will be able to manage your privacy settings, update your profile, contacts, and communities, and review past posts, files, and blogs.
Load a Profile Picture |
Top
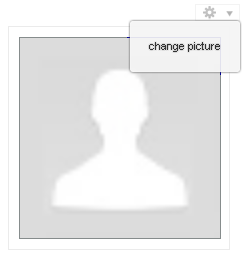
On your profile page click the

icon located at the top right of the grey image outline. Select Choose File to find the image from your computer’s hard drive, then select Upload once you have found the image you wish to use as your profile picture.
Note : You may only upload .jpg, .bmp, .gif, and .png file types.
Update Contact Information |
Top
On your profile page, to the right of your image, click on the Edit Contact Info button. This will launch a new page where you can update you information. This is the same information used by the Academy when mailing certificates or publications, driving potential patients with ENTLink, or helping connect you with colleagues. Once you have saved your information, click the Refresh Member Data button and the changes will be reflected.
Search for Contacts |
Top
Finding fellow members is simple. Click the Directory tab at the top of the screen to search for fellow members using their First or Last Name, Company Name, or Email Address. For more in-depth searches, use the Advanced Search tool.
Manage Privacy Settings |
Top
On the main profile page select
Privacy Settings
Once you are on the Privacy Settings Page you can manage contact preferences, how other users can contact you, as well as how you will appear on rosters.
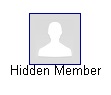
If you select No, that you do not want to appear on rosters, you will appear as a hidden member and other members in your community will not be able to contact you.
Manage Subscriptions |
Top
Once you have signed up for a discussion group, you will be prompted to select how often you receive emails. If you need to return at a later time to update your email selection select
My Subscriptions under the My Profile.
Select the frequency that you wish to receive updates.
•
Real Time – Receive email updates in real time
(Suggested).
•
Daily Digest – Email with updates are delivered once a day.
•
Legacy – Simple text emails sent in real time.
•
No Emails – Do not receive notices, ever.
Updating Your Password |
Top
ENTConnect employees an encrypted single sign on system to sync the Academy’s website, www.entnet.org, with ENTConnect. To update your password, please
click here to request an encrypted link be sent to your email address.
For information or assistance please contact
memberservices@entnet.org or call (703) 836-4444.
Joining a Community |
Top
To see available communities, click the
Communities tab at the top of the screen. Under the list of all communities, click the green
Join button to become part of the committee.
Managing the Library Page |
Top
Members will only have the right to add or view documents, if you need a new folder, please contact your Community Administrator.
Folder Contents

- Add a new document

- View a document
Post a Discussion |
Top
On the discussion page of a community press the
button to create a new discussion.
On the Post a Message page you can direct to which group your message is posted, as well as if you wish to cross post in a different yet relevant community.
Note: If attaching documents to your post, it will not add the document to a post, but will add a link to a document stored on a community’s library.
Delete a Discussion Post |
Top
Unfortunately, only the Site Administrator can delete or edit a post on ENTConnect. If there is an offending post that needs to be removed, please email
ENTConnectAdmin@entnet.org for assistance.
Post a Document |
Top
Once you have clicked the
document button you will open the Add Library Entry screen. Selecting the Entry Type will allow you to upload document files, hyperlinks to website, Youtube videos, and webinars.
This will also be the page to describe the document you will be loading to help others locate relevant material.
After you have uploaded the document on the Upload page, you will have the opportunity to rename the document to make the document easier to locate.
Post a YouTube Video |
Top
Follow the steps above, but select YouTube Video under the Entry Type drop down menu.
On the video’s page that you wish to share, under the video click the Share button, copy the link that appears and then paste the link in the Share Link box.
Introduction Videos |
Top
Video walk-through of the profile page

.
Video walk-through of the community pages
.